Get a Custom Quote
Build-a-Bike CSR Donation Program
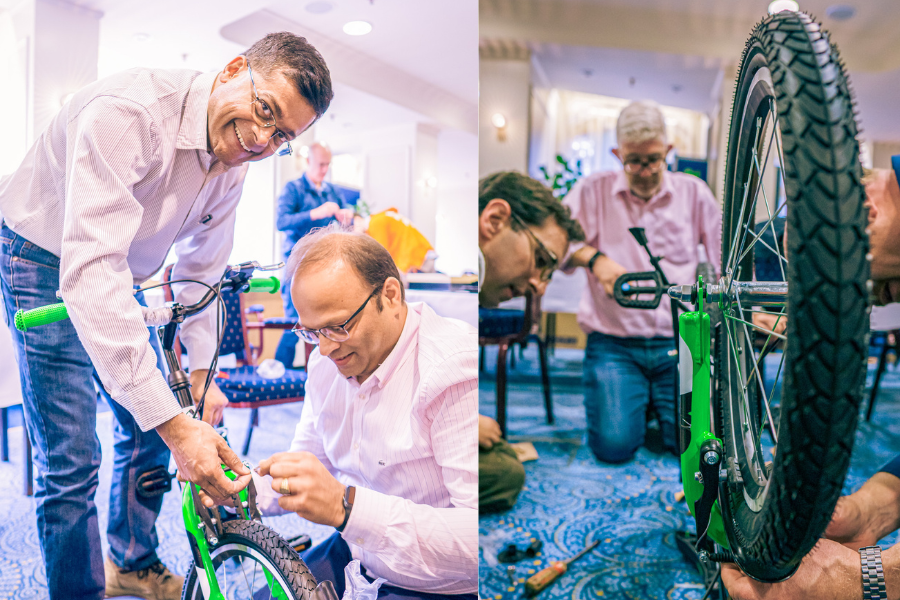
Bike Building Amsterdam is rapidly emerging as one of the most engaging and impactful team-building initiatives, gaining strong popularity as a philanthropic program. It offers more than just a collaborative activity—it creates an opportunity for teams to strengthen communication, enhance cooperation, and support one another, all while contributing to a meaningful cause. Beyond team development, the initiative directly benefits children in need, making the experience both rewarding and purpose-driven.
Inclusions
- Bikes to build.
- Bike presentation.
- Professional support to assemble.
- Charity information.
Other Info
- Duration: 2 – 2.5 hours.
- Minimum: 20 persons.
- Location: on request
- Borrel/after-activity beverages and snacks can be arranged at location.
Activity Details
The program is structured in two phases. It begins with an interactive challenge, such as a quiz or problem-solving activity, designed to encourage teamwork and engagement. This is followed by the hands-on bike-building session, where teams work together to assemble the bicycles. Once completed, each bike is carefully inspected by a specialist to ensure safety and quality.
To add a fun competitive element, the first team to finish is recognized. If time allows, the experience concludes with a mini parade, where the children proudly showcase their new bikes.
For many, receiving their first bike is a cherished childhood memory—one that represents freedom, adventure, and connection. Whether it was racing with friends or enjoying family outings, a bicycle often played a central role in those formative experiences.
While Dutch children are often regarded among the happiest in the world, organizations like UNICEF also highlight that child poverty remains a concern in the Netherlands, with a moderate rate compared to other European countries. This initiative aims to bring the concept of “bike building for charity” to Europe, inspiring companies and individuals to make a tangible difference. In a country so deeply rooted in cycling culture, there is no better place to bring this idea to life and provide children with the simple yet powerful gift of a bicycle.
The Beginner’s Guide to Assembling a Bicycle
Step 1: Organize Your Workspace and Tools
Before touching the bike, clear a flat space. Organizing your parts now prevents frustration later.
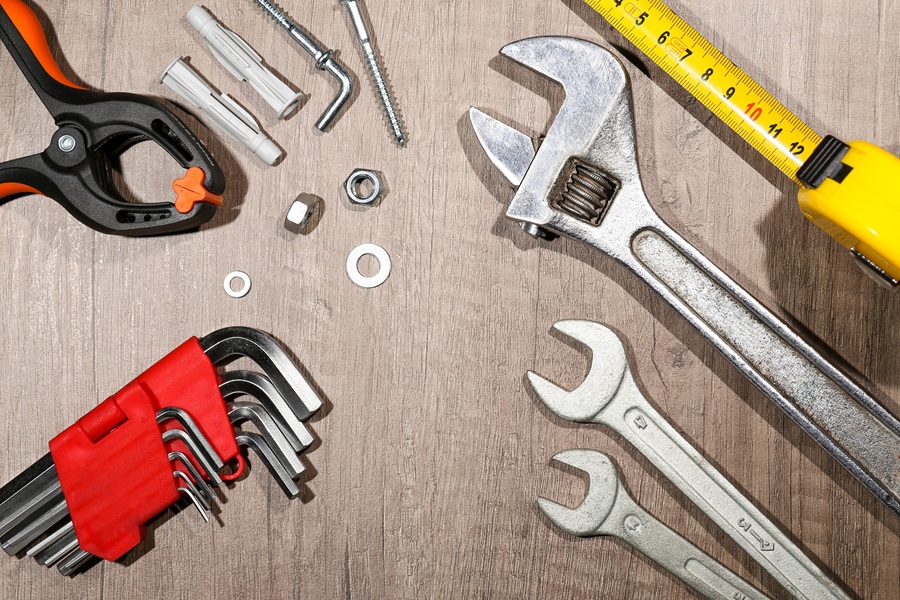
You will generally need:
Hex Keys (Allen Wrenches): Specifically 4mm, 5mm, and 6mm.A 15mm Wrench: Necessary for pedals and some wheel types.
Bicycle Grease: To protect threaded parts from rust and seizing.
Floor Pump: To set your tire pressure.
Step 2: The Fork and Cockpit
If your bike is partially disassembled, the first goal is to get the “steering” set up.
Slide the Fork into the Frame: Ensure the bearings are sitting flat in the head tube.
Attach the Stem: Slide the stem onto the fork tube and tighten it slightly to hold everything together.
Mount the Handlebars:
Center the bars in the stem clamp. Ensure your brake levers and shifters are angled so your wrists stay straight when riding.
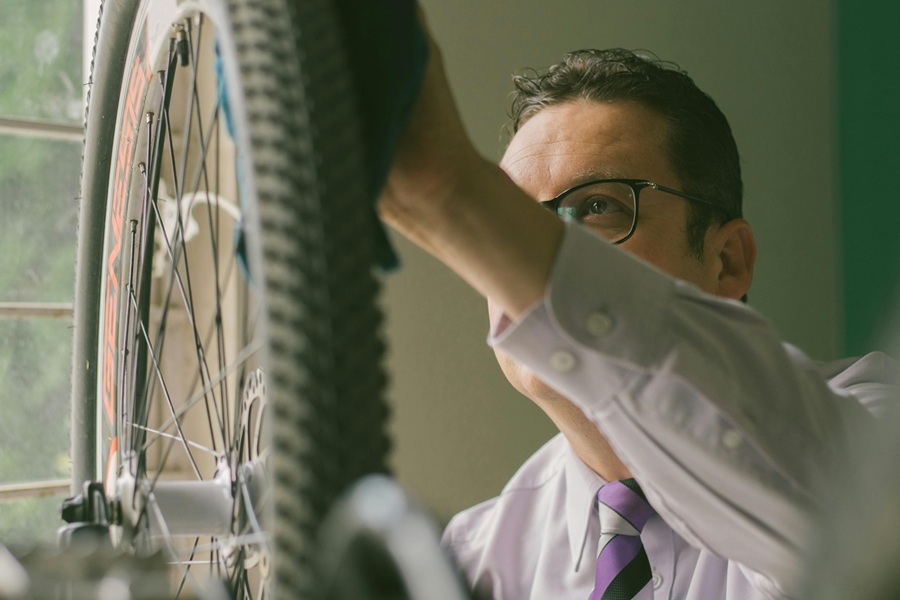
Step 3: Installing the Front Wheel
Most bikes come with the rear wheel already attached. For the front:
Align the Disc or Rim: If you have disc brakes, carefully slide the rotor between the brake pads.
Secure the Axle: If using a quick-release lever, tighten the nut until the lever leaves a faint imprint on your palm when closed.
Step 4: Mastering the Pedals
Pedals are the most common place for beginners to make a mistake.
Identify Left and Right: Look for an “L” and “R” stamped on the axle.
he Right Side: Tightens normally (clockwise).The Left Side: This is reverse-threaded. You must turn it counter-clockwise to tighten it.
Pro Tip: Always apply a small dab of grease to the threads first. This ensures you can actually remove them in the future!
Step 5: Seat post and Saddle Height
Grease the Post: Apply a thin layer of grease to the seat post before sliding it into the frame.
Level the Saddle: Ensure the seat is level with the ground. A tilted seat can cause discomfort or numbness during long rides.
Step 6: The Pre-Ride Safety Check
Never skip the “Bolt Check.” Work your way from the front of the bike to the back:
Handlebar Twist: Hold the front wheel between your knees and try to twist the bars. They should not move.
Brake Squeeze: Pull both levers hard. They should stop the wheels and should not touch the handlebars.
Air Pressure: Ensure your tires are firm. Low pressure is the leading cause of “pinch flats.”
Build-a-Bike CSR Program: Frequently Asked Questions FAQ
What is a Build-a-Bike CSR program?
How does the bike donation benefit the community?
Do employees need mechanical experience to participate?
Is the equipment safe for children?
Which charities receive the bike donations?
Is the equipment safe for children?
Can we meet the children who receive the bikes?
What is included in the Build-a-Bike event?
Brand-new children’s bicycles (various sizes).
High-quality safety helmets for every child.
Professional tools and assembly stations.
Expert facilitators and safety mechanics.
Coordination with local charities and logistics.
How does this event improve employee engagement?
Build-a-Bike CSR Donation Program
Bike Building Amsterdam is rapidly emerging as one of the most engaging and impactful team-building initiatives, gaining strong popularity as a philanthropic program. It offers more than just a collaborative activity—it creates an opportunity for teams to strengthen communication, enhance cooperation, and support one another, all while contributing to a meaningful cause. Beyond team development, the initiative directly benefits children in need, making the experience both rewarding and purpose-driven.
Inclusions
- Bikes to build.
- Bike presentation.
- Professional support to assemble.
- Charity information.
Other Info
- Duration: 2 – 2.5 hours.
- Minimum: 20 persons.
- Location: on request
- Borrel/after-activity beverages and snacks can be arranged at location.
Get a Custom Quote
Activity Details
The program is structured in two phases. It begins with an interactive challenge, such as a quiz or problem-solving activity, designed to encourage teamwork and engagement. This is followed by the hands-on bike-building session, where teams work together to assemble the bicycles. Once completed, each bike is carefully inspected by a specialist to ensure safety and quality.
To add a fun competitive element, the first team to finish is recognized. If time allows, the experience concludes with a mini parade, where the children proudly showcase their new bikes.
For many, receiving their first bike is a cherished childhood memory—one that represents freedom, adventure, and connection. Whether it was racing with friends or enjoying family outings, a bicycle often played a central role in those formative experiences.
While Dutch children are often regarded among the happiest in the world, organizations like UNICEF also highlight that child poverty remains a concern in the Netherlands, with a moderate rate compared to other European countries. This initiative aims to bring the concept of “bike building for charity” to Europe, inspiring companies and individuals to make a tangible difference. In a country so deeply rooted in cycling culture, there is no better place to bring this idea to life and provide children with the simple yet powerful gift of a bicycle.
The Beginner’s Guide to Assembling a Bicycle
Step 1: Organize Your Workspace and Tools
Before touching the bike, clear a flat space. Organizing your parts now prevents frustration later.
You will generally need:
Hex Keys (Allen Wrenches): Specifically 4mm, 5mm, and 6mm.A 15mm Wrench: Necessary for pedals and some wheel types.
Bicycle Grease: To protect threaded parts from rust and seizing.
Floor Pump: To set your tire pressure.
Step 2: The Fork and Cockpit
If your bike is partially disassembled, the first goal is to get the “steering” set up.
Slide the Fork into the Frame: Ensure the bearings are sitting flat in the head tube.
Attach the Stem: Slide the stem onto the fork tube and tighten it slightly to hold everything together.
Mount the Handlebars:
Center the bars in the stem clamp. Ensure your brake levers and shifters are angled so your wrists stay straight when riding.
Step 3: Installing the Front Wheel
Most bikes come with the rear wheel already attached. For the front:
Align the Disc or Rim: If you have disc brakes, carefully slide the rotor between the brake pads.
Secure the Axle: If using a quick-release lever, tighten the nut until the lever leaves a faint imprint on your palm when closed.
Step 4: Mastering the Pedals
Pedals are the most common place for beginners to make a mistake.
Identify Left and Right: Look for an “L” and “R” stamped on the axle.
he Right Side: Tightens normally (clockwise).The Left Side: This is reverse-threaded. You must turn it counter-clockwise to tighten it.
Pro Tip: Always apply a small dab of grease to the threads first. This ensures you can actually remove them in the future!
Step 5: Seat post and Saddle Height
Grease the Post: Apply a thin layer of grease to the seat post before sliding it into the frame.
Level the Saddle: Ensure the seat is level with the ground. A tilted seat can cause discomfort or numbness during long rides.
Step 6: The Pre-Ride Safety Check
Never skip the “Bolt Check.” Work your way from the front of the bike to the back:
Handlebar Twist: Hold the front wheel between your knees and try to twist the bars. They should not move.
Brake Squeeze: Pull both levers hard. They should stop the wheels and should not touch the handlebars.
Air Pressure: Ensure your tires are firm. Low pressure is the leading cause of “pinch flats.”
Build-a-Bike CSR Program: Frequently Asked Questions FAQ
What is a Build-a-Bike CSR program?
How does the bike donation benefit the community?
Do employees need mechanical experience to participate?
Is the equipment safe for children?
Which charities receive the bike donations?
Is the equipment safe for children?
Can we meet the children who receive the bikes?
What is included in the Build-a-Bike event?
Brand-new children’s bicycles (various sizes).
High-quality safety helmets for every child.
Professional tools and assembly stations.
Expert facilitators and safety mechanics.
Coordination with local charities and logistics.
How does this event improve employee engagement?
Discover other activities
Ready to host your own charity bike build?
Your event is full of possibilities —we’re here to unlock them.
Keep exploring our services
We take pride in what we do. Our services are end-to-end, covering program and attendee management, transportation, venue selection, and full logistical coordination. Discover the many other ways we can support you.
Connect with us
Let's talk
Have an activity idea? Tell us about it.
We’ll make it happen!